

Spaghetti squash is one of my favorite winter squashes because of its unique texture. When cooked properly, it has noodle-like strands that you can use in soup, casseroles, and more. But if you don’t cook it properly, it can be a mushy, watery mess.
That’s why I’ve spent the past few weeks figuring out the best way to cook spaghetti squash. (Plus developing recipes that don’t just use it like spaghetti.) If you’ve been disappointed with watery or crunchy strands in the past, be sure to read all of the tips below. I’ll show you the best way to cut it and how to get the longest “noodles” possible.
In this post I’ll cover how to bake spaghetti squash in the oven, but I’ve also tested it in the slow cooker and Instant Pot if you prefer a more hands-off method. You’ll be eating more squash in no time!
⭐⭐⭐⭐⭐ Featured Review
“Your Cheesy Spaghetti Squash Casserole is my family’s FAVORITE! We use this method to cook the squash before making it, and the squash always turns out perfectly.” – Wendy

How to Cut Spaghetti Squash
There are two ways to cut spaghetti squash: crosswise and lengthwise. Crosswise means you’re cutting through only the center, while lengthwise means you’re cutting from the top (where the stem is) to the bottom.
I’ve labeled and cut two spaghetti squashes below, so you can see the difference.
I think it’s significantly easier to cut spaghetti squash crosswise, because it’s hollow in the center where the seeds are. My knife has actually gotten stuck when trying to cut through the bottom before, and this never happens when I cut the squash crosswise.
As an added bonus, you’ll also get longer noodle-like strands when you cut the squash crosswise. So, I think that’s the best way to cut spaghetti squash. (Unless you need the squash for a boat recipe; then lengthwise makes more sense.)
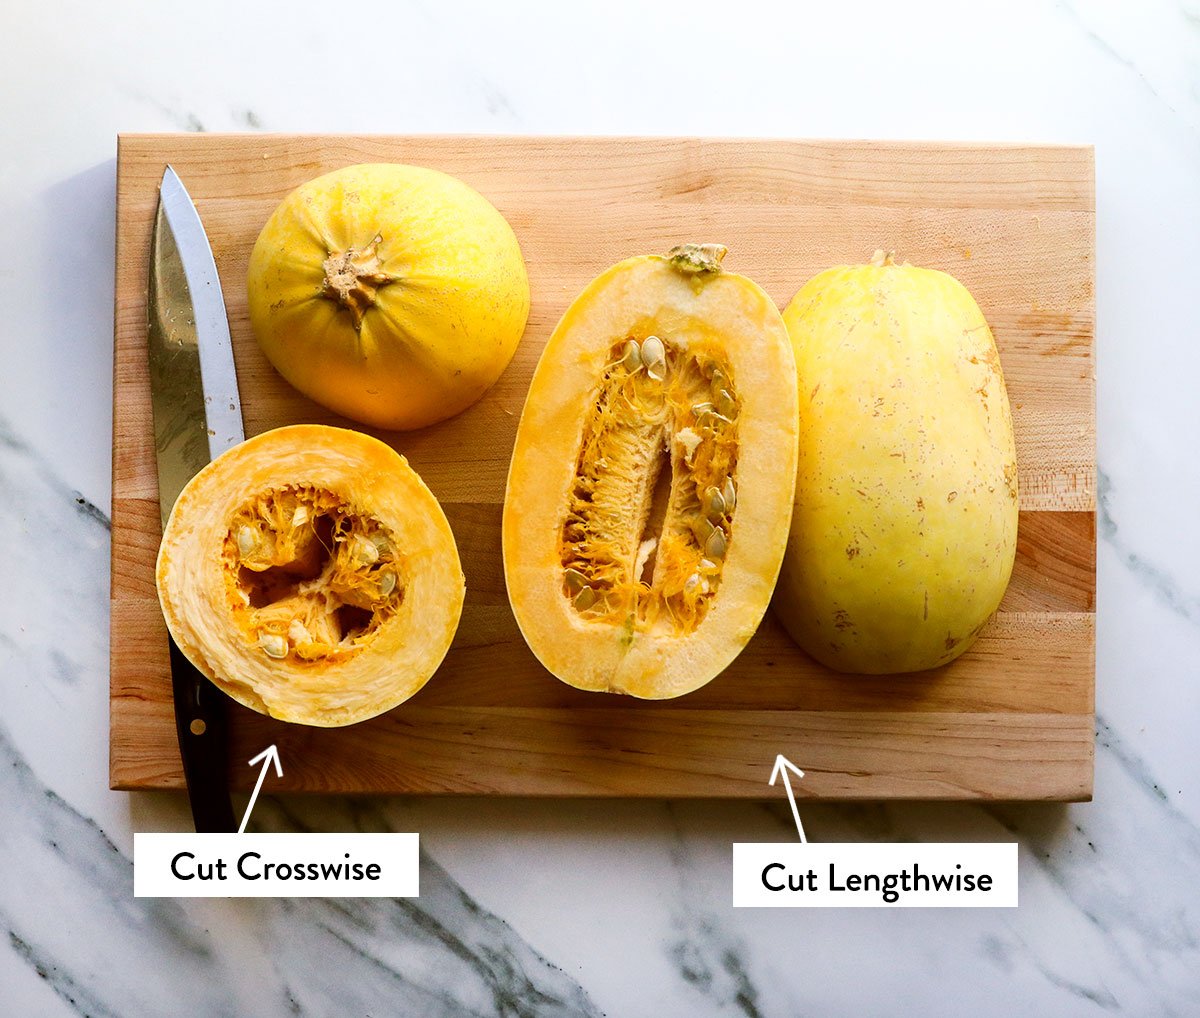
Note: Technically, there’s a third option for cutting spaghetti squash. You can cut it into rings (like the shape of onion rings), to help it bake faster. I am not a fan of cutting through the tough shell as it is, so I’m not about to cut into it several more times to make rings. But, you can experiment with that if you want to.
How to Cook Spaghetti Squash
Step 1:
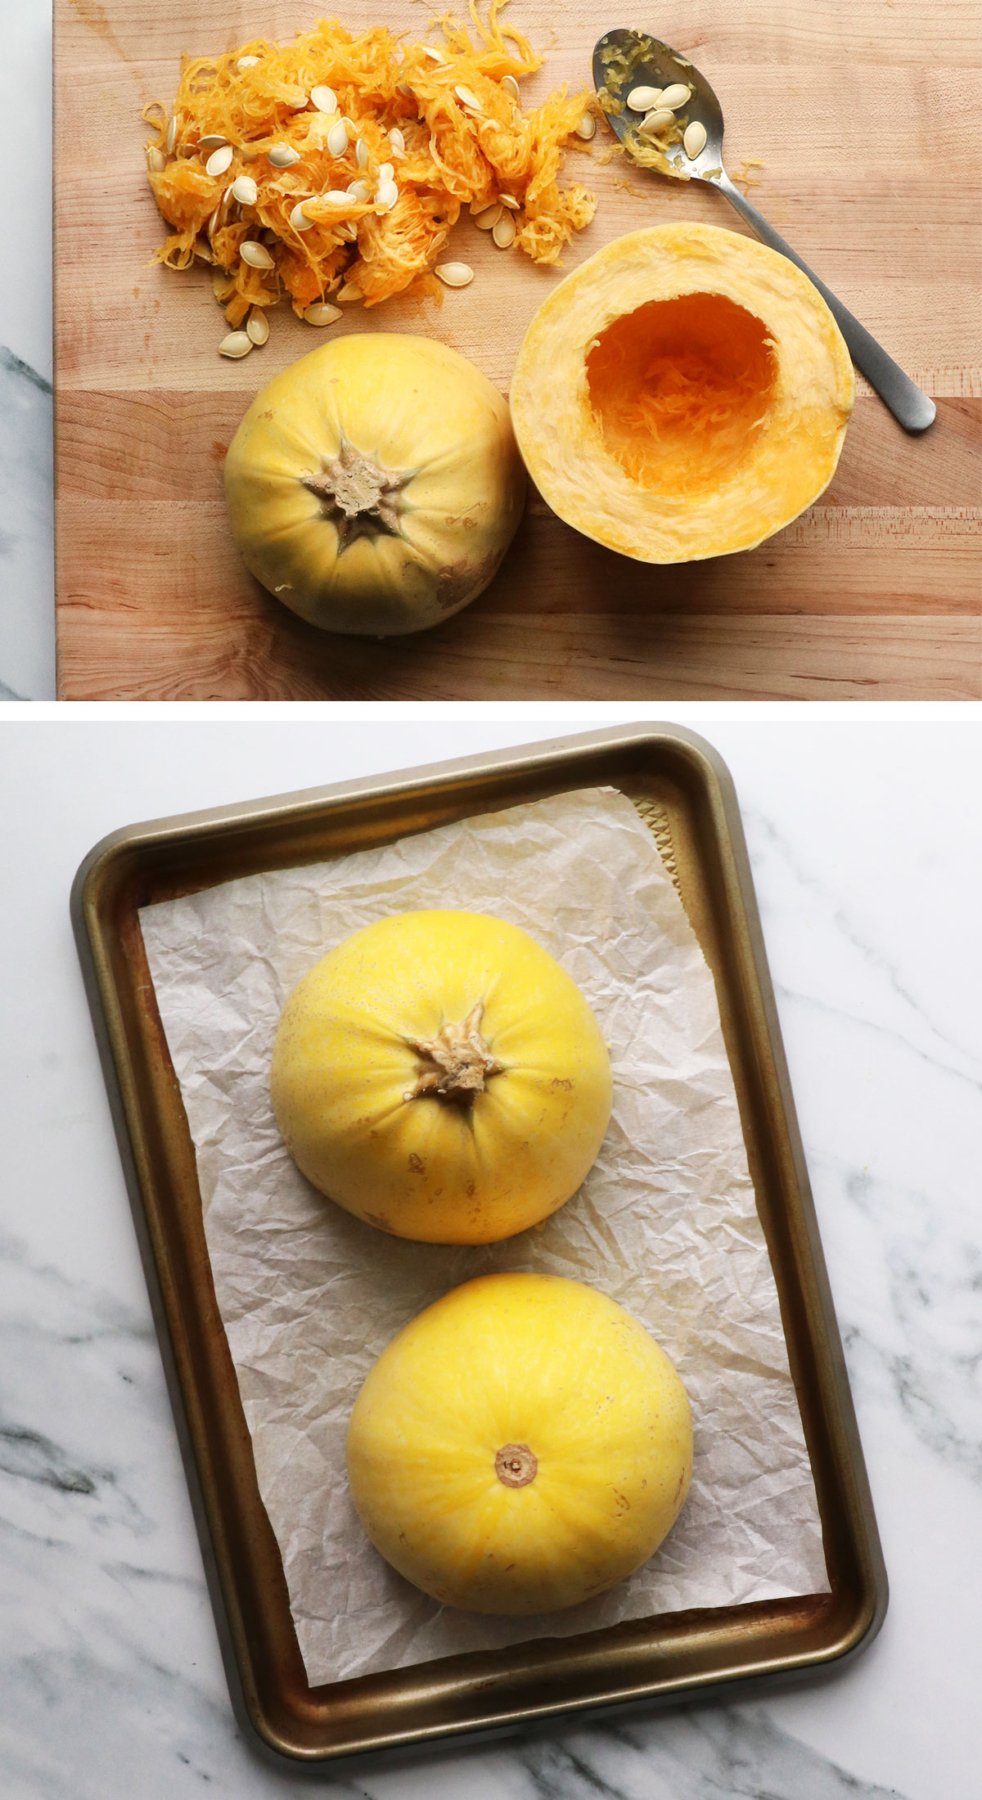
Preheat the oven to 400ºF and line a rimmed baking sheet with parchment paper. I like to use a rimmed pan in case the squash releases juices as it cooks; the pan will keep the juices inside, so they don’t drip into your oven.
Cut the squash as directed above and scoop out the seeds. Arrange the squash cut side facing down on the lined pan. This will allow any moisture to drip away from the squash as it bakes. (Making it less likely to be mushy.)
Step 2:
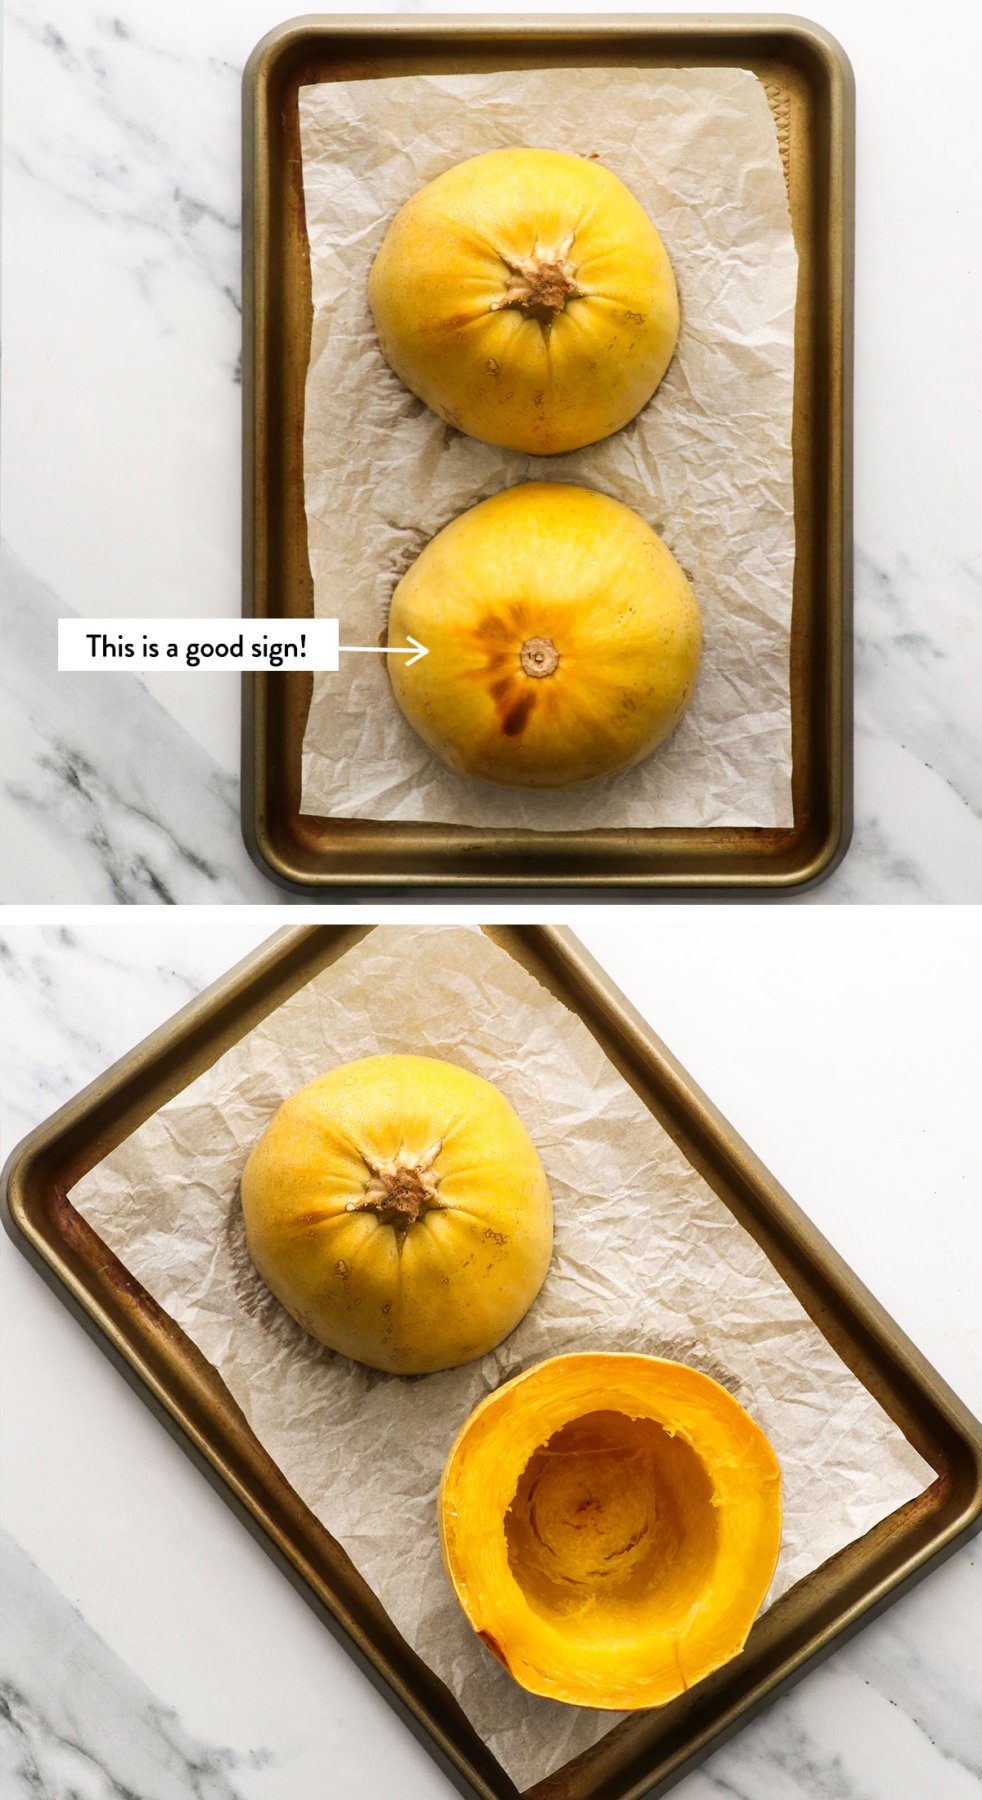
Bake spaghetti squash at 400ºF for 45 to 55 minutes for a 3-pound squash. (A smaller squash may bake slightly faster.)
Ideally, you want to see the outer shell start to develop golden brown spots. That’s a good sign that the inside is tender! You can remove the pan from the oven and pierce the shell with a fork to test for tenderness; if the fork slides in and out of the shell easily, without a lot of pressure, it’s likely done.
Let the squash cool on the pan for at least 10 minutes so it’s easier to handle.
Step 3:
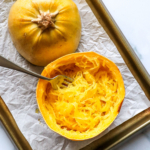
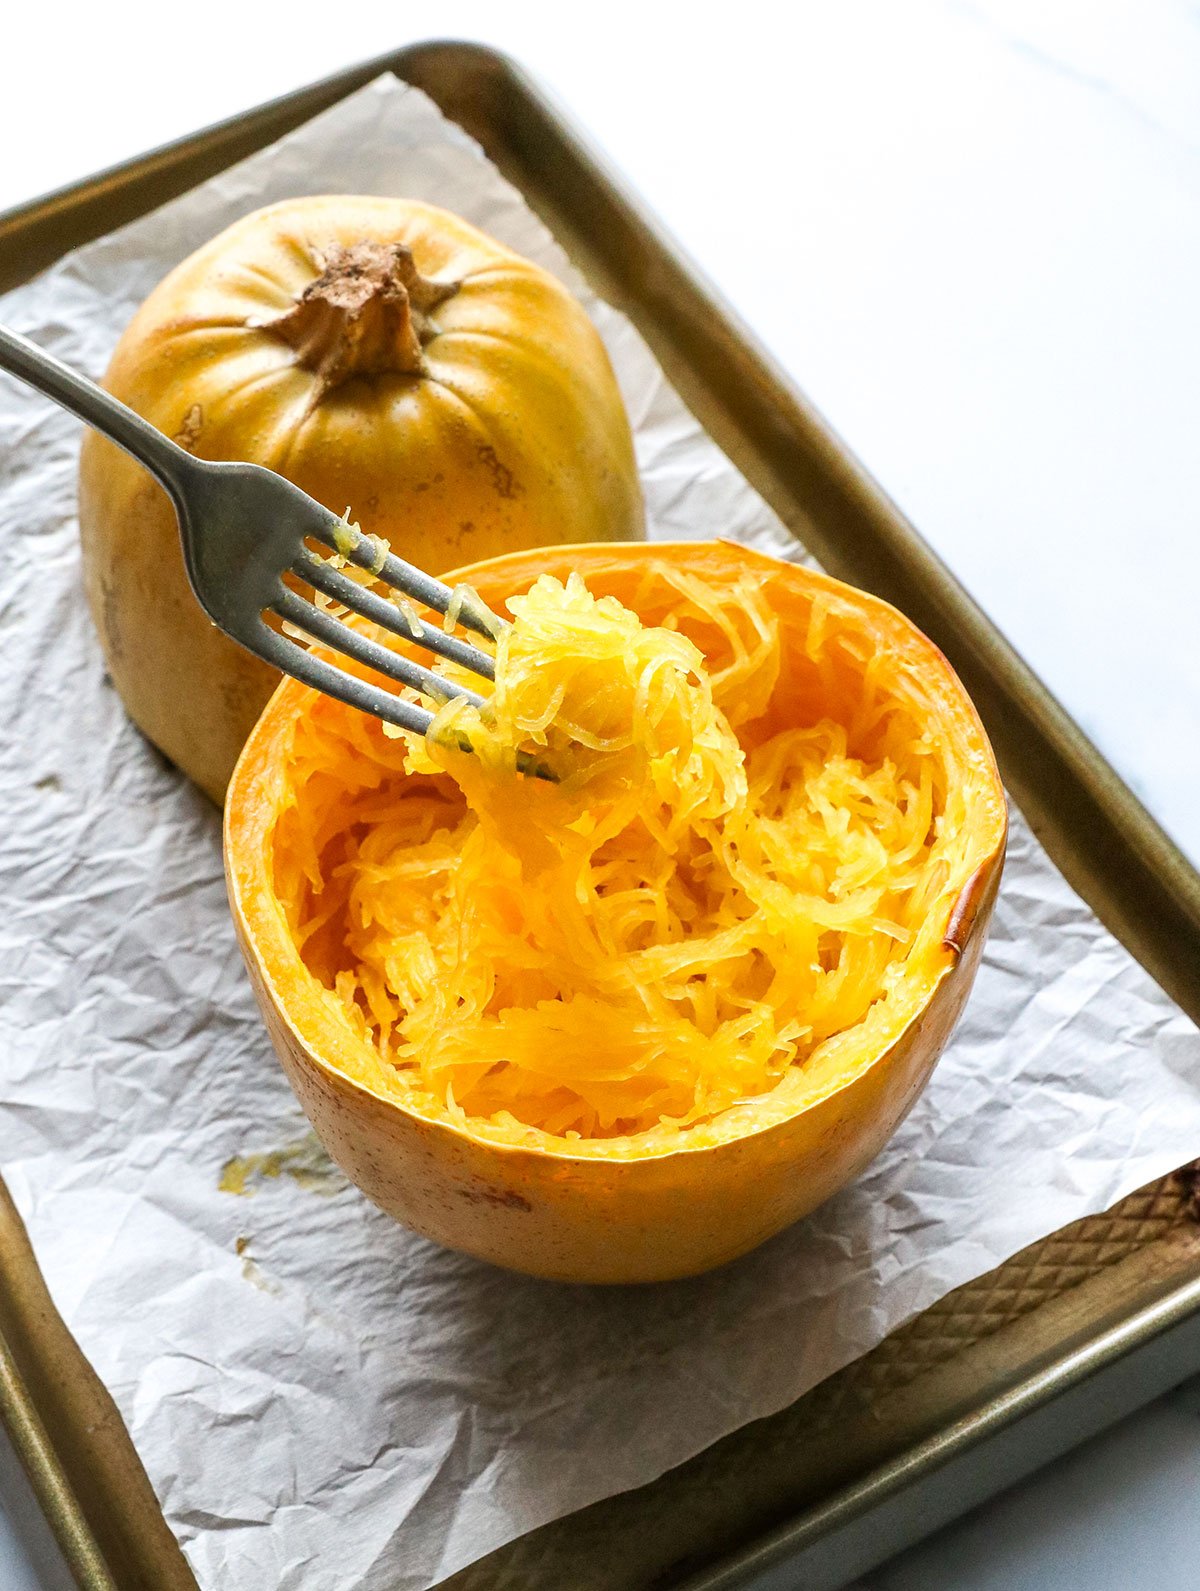
Use oven mitts or a towel to carefully flip the squash over, because it will still be hot to the touch. Use a fork to gently pull the squash strands away from the shell, towards the empty center area. You’ll notice that the strands are much longer when you cut the squash crosswise!
Use the squash right away in your favorite recipe, or transfer it to an airtight container with a lid. Spaghetti squash can be stored in the fridge for up to 5 days.
- 1 spaghetti squash (about 3 to 4 pounds)
-
Preheat the oven to 400ºF and line a baking sheet with parchment paper to prevent sticking. (You can grease the pan with oil, if you prefer.)
-
Use a sharp, sturdy knife to cut the squash in half crosswise. Since the shell is so tough, it’s easiest to cut through only the center (where it’s hollow) rather than through the harder end with the stem. Use a spoon to scoop out the seeds and any stringy middles.
-
Place the squash halves cut-side-down on the pan, which will allow water to drip out as they cook, then roast in the oven at 400ºF until tender, about 45 to 60 minutes. It’s ideal if the outer shell starts to brown a bit; that’s a great sign that the inside will be tender, rather than crunchy.
-
When you’re ready to check on the squash, remove the pan from the oven and pierce the outer shell with a fork. It should easily slide in and out, without much pressure. When the squash is tender, let it cool for 10 minutes so it’s easier to handle.
-
Use an oven mitt or towel to hold the squash, as it will still be hot. Using a fork, scrape the cooked flesh out of each squash half into a bowl. Because you cut the squash in half crosswise, the noodles will be longer than if you had cut it lengthwise.
-
Use the cooked spaghetti squash right away, or transfer it to an airtight container and store it in the fridge for up to 5 days. (See recipe suggestions in the full post.)
Calories: 74kcal | Carbohydrates: 16g | Protein: 1g | Fat: 1g | Sodium: 41mg | Potassium: 260mg | Fiber: 3g | Sugar: 6g | Vitamin A: 290IU | Vitamin C: 5mg | Calcium: 56mg | Iron: 0.8mg
Recipes that Use Spaghetti Squash
If you try this method to prepare spaghetti squash, please leave a comment and star rating below to let me know how it works for you.
Want what I'm finding?
One email a week. The research I'm digging into and what's actually working after 40. No noise.
